This story has been restored from the magazine archive. The text is original; outdated contact details have been removed.
Lesson 1: THE FIRST FLY: RED TAG
The Hooks
When tying flies every type of fly need its own type
of hook. There are wetfly, dryfly, streamer, nymph, salmonfly etc hooks. The sizes of the
hooks are marked with numbers: Size 0 does not exist, Number 1 is the largest and the size
is smaller the bigger the number is. Large hooks are marked with 0/-sizes. 0/1 is the
smallest of them and the bigger the number after / is the larger the hook is.
The length of the shank is told by the multiples
compared with the size of the gap. If the expression is 3x, it means that the length of
the shank is three time the wide of the gap. If the wire of the hook differs from normal,
it is expressed for instance: light = thin wire for dryflies or heavy = thick wire for
sinking type of flies. The eye of the can be upwards, straight of downwards. There are a
lot of special hooks like swimming nymph, curved nymph, grub etc. The choose the right
hook is anyway easy, because the type of the hook needed is told in the tying recipe of
the fly.
How to fasten the hook in the vise
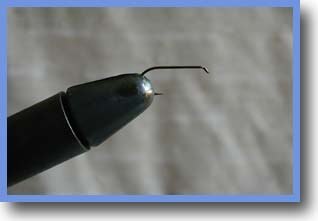
Adjust first the jaws so that they lightly hold the hook. Fasten the hook in
the vise with fastlock-handle. Handle should go into the fastening position easily, no
force is allowed. The hook shank must be horisontal. When You fasten the hook like in the
picture with point visible, it makes easier to ty the right relationships for the fly. You
learn fast to be careful with the sharp, thread-cutting point.
RED TAG
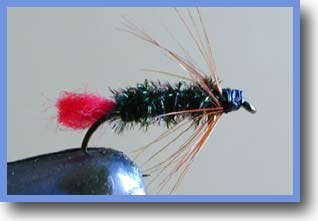
The Tying Recipe:
Hook: Wetfly number 8-16
Tail: Red woolyarn
Body: Peacock herl 3-4 pcs
Hackle: Brown cock feather
Head: Black
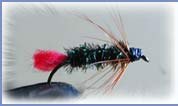
This recipe is over 150 years old, but still in 3rd
millennium Red Tag is a fly to catch fishes. Specially it pleases graylings, but You can
catcch with Red Tag all the salmonides, even perches love it. There is tens of variations
of Red Tag. When it is tyed in the long shank streamerhook and the body is palmerhackled,
the fly is excellent for the seatrouts of the Baltic Sea. In Lapland the Red Tag is a
must: You need at least some flies in sizes 10-14. This secures tasty fish meals, when
hiking and fishing in the wilderness.
THE TYING:
The beginning:
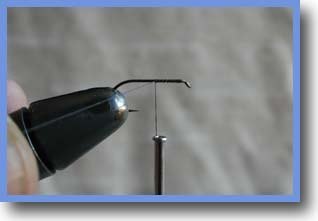
Make the start knot and secure it with the the half
hitch.
The Priming:
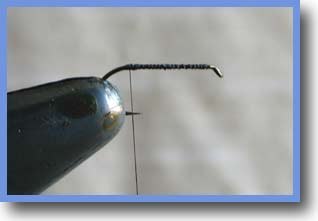
Make the priming on the hookshank with side-by-side turns
of the thread.Varnish the priming lightly.
The Tail:
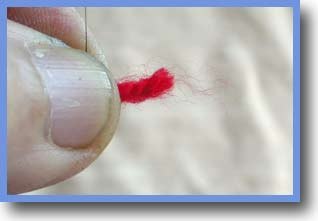
Turn the thread to the front of the hook. Leave about
2 mm free room in the front. It is needed for the hackle and the head. Take about 1,5
inches red woolyarn. Take the yarn between the left hand thumb and forefinger and put it
on the shank. Take the thread between the fingers and form a loose loop.
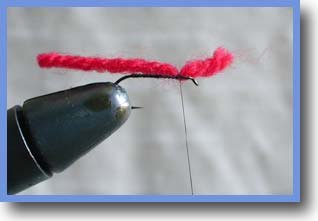
When You pull the spigot downwards and at the same time
let the thread slide between Your fingers the wool will fasten in the right place. Make
some safety turn and a half hitch.
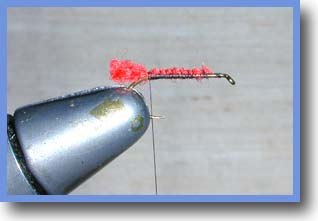
Hold the woolyarn in Your left hand. This prevents the
yarn to turn with the thread, when the thread travels with tight turns to the back of the
shank. When the wool is fastened on the shank make a half hitch. Cut the woolyarn in front
and in the back. The right length of Red Taag tail is about 2 mm. Take a clean needle and
make the tail look puffy. Travel with turns the tthread to the front. Look the picture:
there is still free room for the hackle and the head.
The Body:
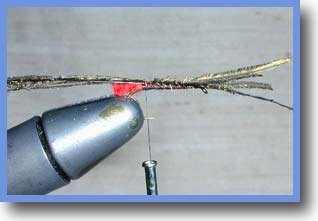
Take 3-4 peacock herls tips forward in Your left hand.
Fasten the herls like You fastened the tail. Make a half hitch.
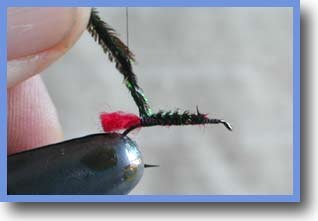
Lift the spigot and the thread upwards. Turn the herls
around the thread. This forms a kind of herlthread. This way there is no loose loop of
herls at the end of the body.
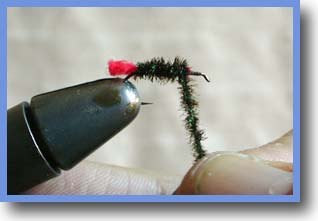
Take the herlthread in Your right hand. Turn this rope
with side-by-side turns directed out of yourself and form the body of the fly. Remember in
the frontpart those important 2 mms.
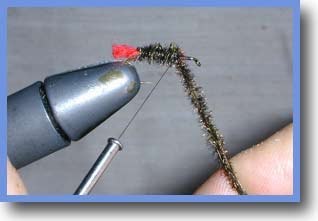
When the body is ready, open the rest of the herlthread
as thread and herls again. Hold the herls tight in Your right hand. Turn the spigot and
the thread two or three times over the herls exactly in front of the body so that the
thread tightens the herls. Tie some safety turns and a half hitch.
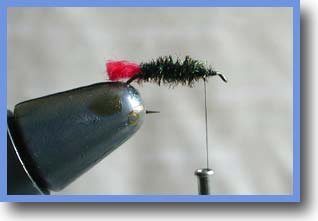
Cut the extra herls. Now the tail and the body are ready.
The Hackle
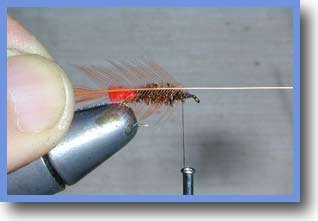
Choose out of a brown cock cape about the rigt size of
the hacklefeather. Look at the picture, how to measure the right size. When the point of
fastening is decided, strip the extra web away.
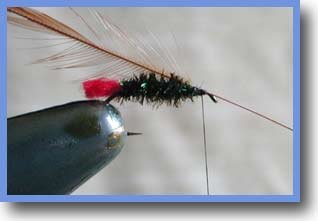
Fasten the feather exactly in front of the body. The
shiny, convex side of the feather should show forward, and the webs should start just in
front of the body.
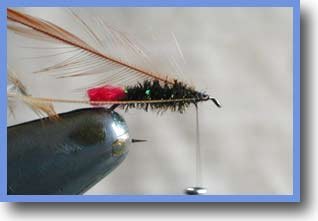
Fasten the hackle with turning the thread forward. Make a
half hitch. Turn the bold shaft backwards and return with the thread to the front of the
body. This way the shaft will be under two layers of thread, so it will not slip away when
the hackle is tyed. Cut the extra shaft.
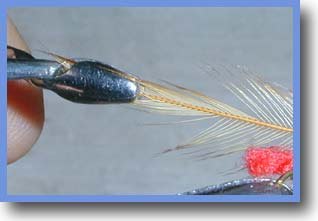
Take the tip of the shaft between the jaws of the
haclepliers. Look at the picture: The shaft is exactly between the jaws.
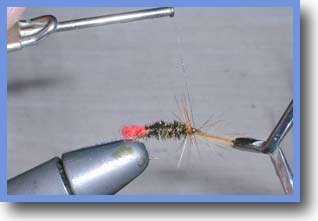
Take the thread forward near the eye of the hook. Turn
the hackle 2-3 turns. Make the first turn exacly in front of the body and the next ones
side-by-side towards the eye. Take the hackle pliers in the right hand. With the left hand
make 2-3 fastening turns with the thread so that the thread fastens the hackle in its
place. This is one of the basics of fly-tying. Only practice makes You to learn correct
tying.
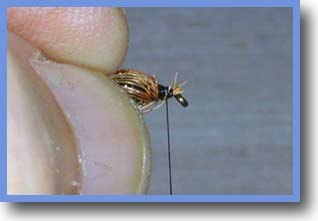
Hold the hackle with left hand the way the picture shows:
fingers press the webs backwards.
Form with the thread a nice small head for the fly.
The head gives a part of the swimm to the fly andthis effects on how the fly catches
fishes. When the webs show a little bit backwards the fly is ready to be finished. Make
4-6 half hitches. Varnish the head and let it dry.
WHIP FINISH KNOT
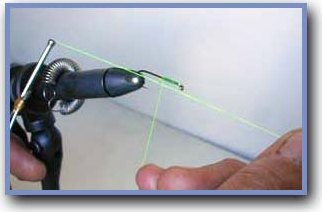
Hold the thread going to the hook tight. Form a loose
loop out of the loose end of the thread. Set spigot hanging free on the vise.
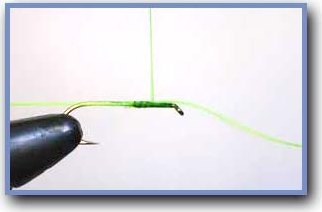
Turn the tight thread on the loose with 6-8 turns
forward.
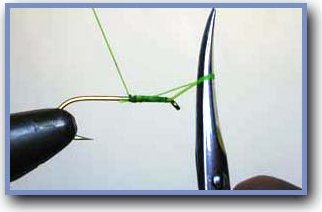
Take the loose loop on scissors or needle, tighten it and
pull the spigot. The loose thread slips under the turn. Cut the thread. In the pictures
the knot is tied on a quite long area. When a fly is finished, the knot must be tied
exactly in the head area. Practise!
You have tyed Your first fly: Red Tag
Next: Leech |